Electrician Install Procedures
First of all, thanks for being part of the Bractlet team. Please see below for introductory materials to Bractlet’s meter installation. You will find the Power Meter Installation Procedures, install forms (must be filled out for every meter installed), and a list of items you will need for the install. Bractlet will always supply a hardware planning guide to indicate where the meters should be installed, size of CTs to be attached, and any necessary expansion boards. All meters require a 277V input/phase unless specifically noted otherwise.
Bractlet Wireless Submetering System
This is the most important document you will read in the course of installing Bractlet's hardware. It contains the step-by-step overview of what any electrician would need to know in installing our products.
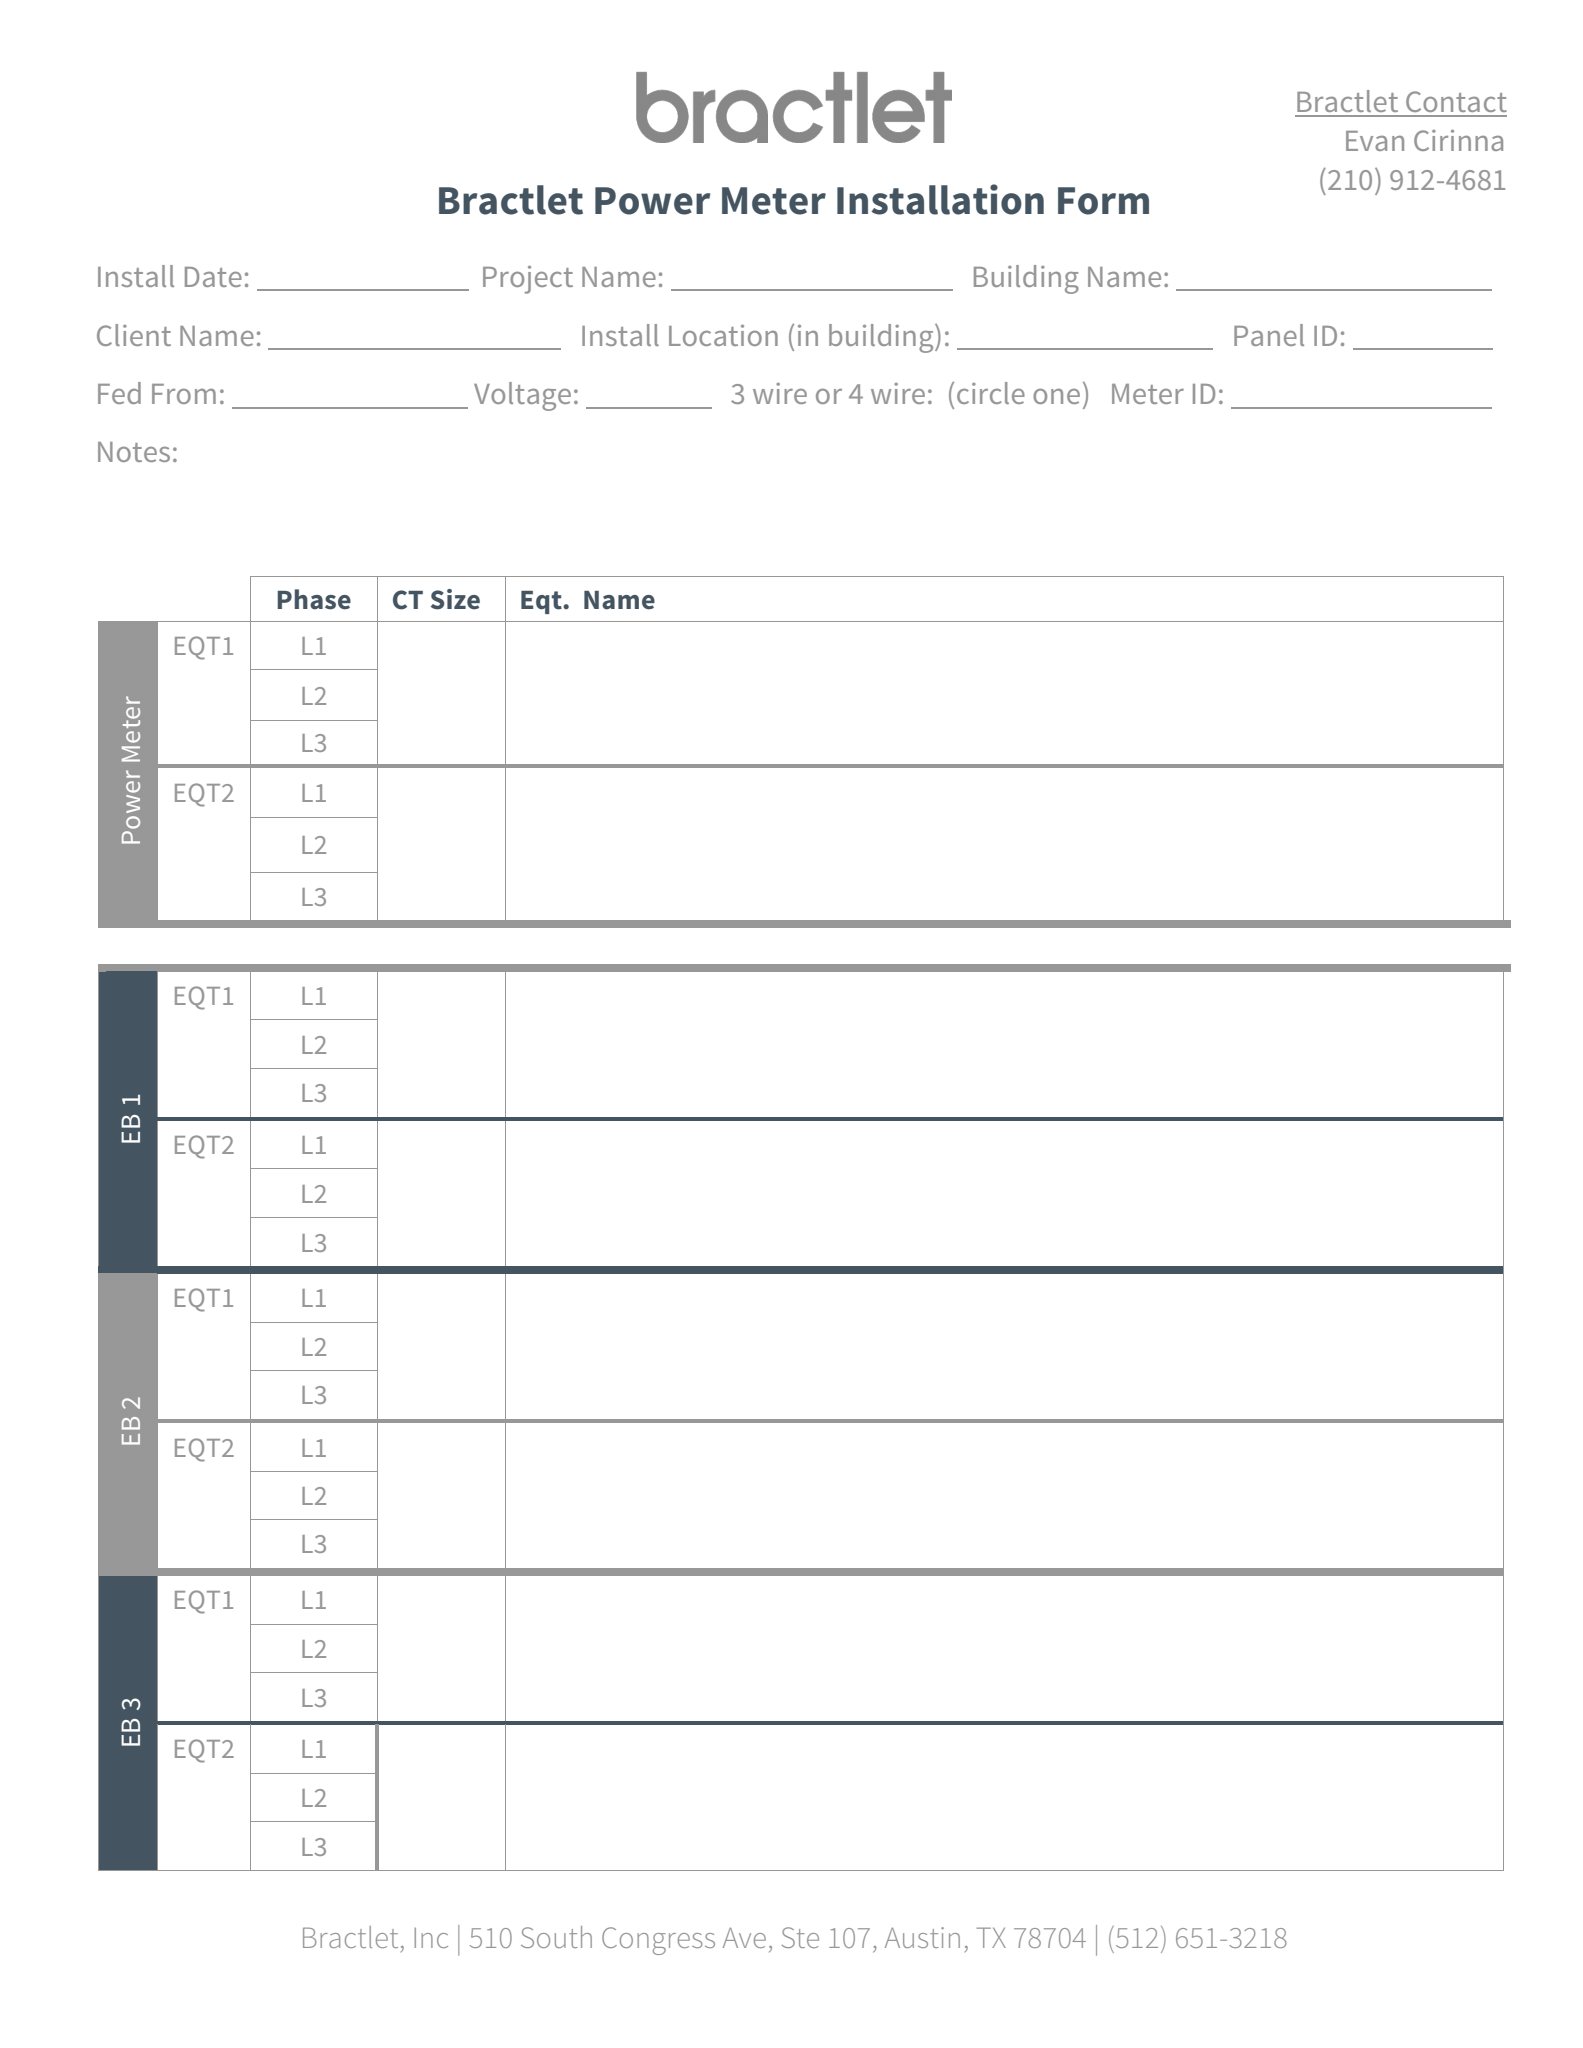
Bractlet Power Meter Installation Form
This should be filled out for each installation. Please bring printed or digitally downloaded copies of this document filled out with every installed meter.
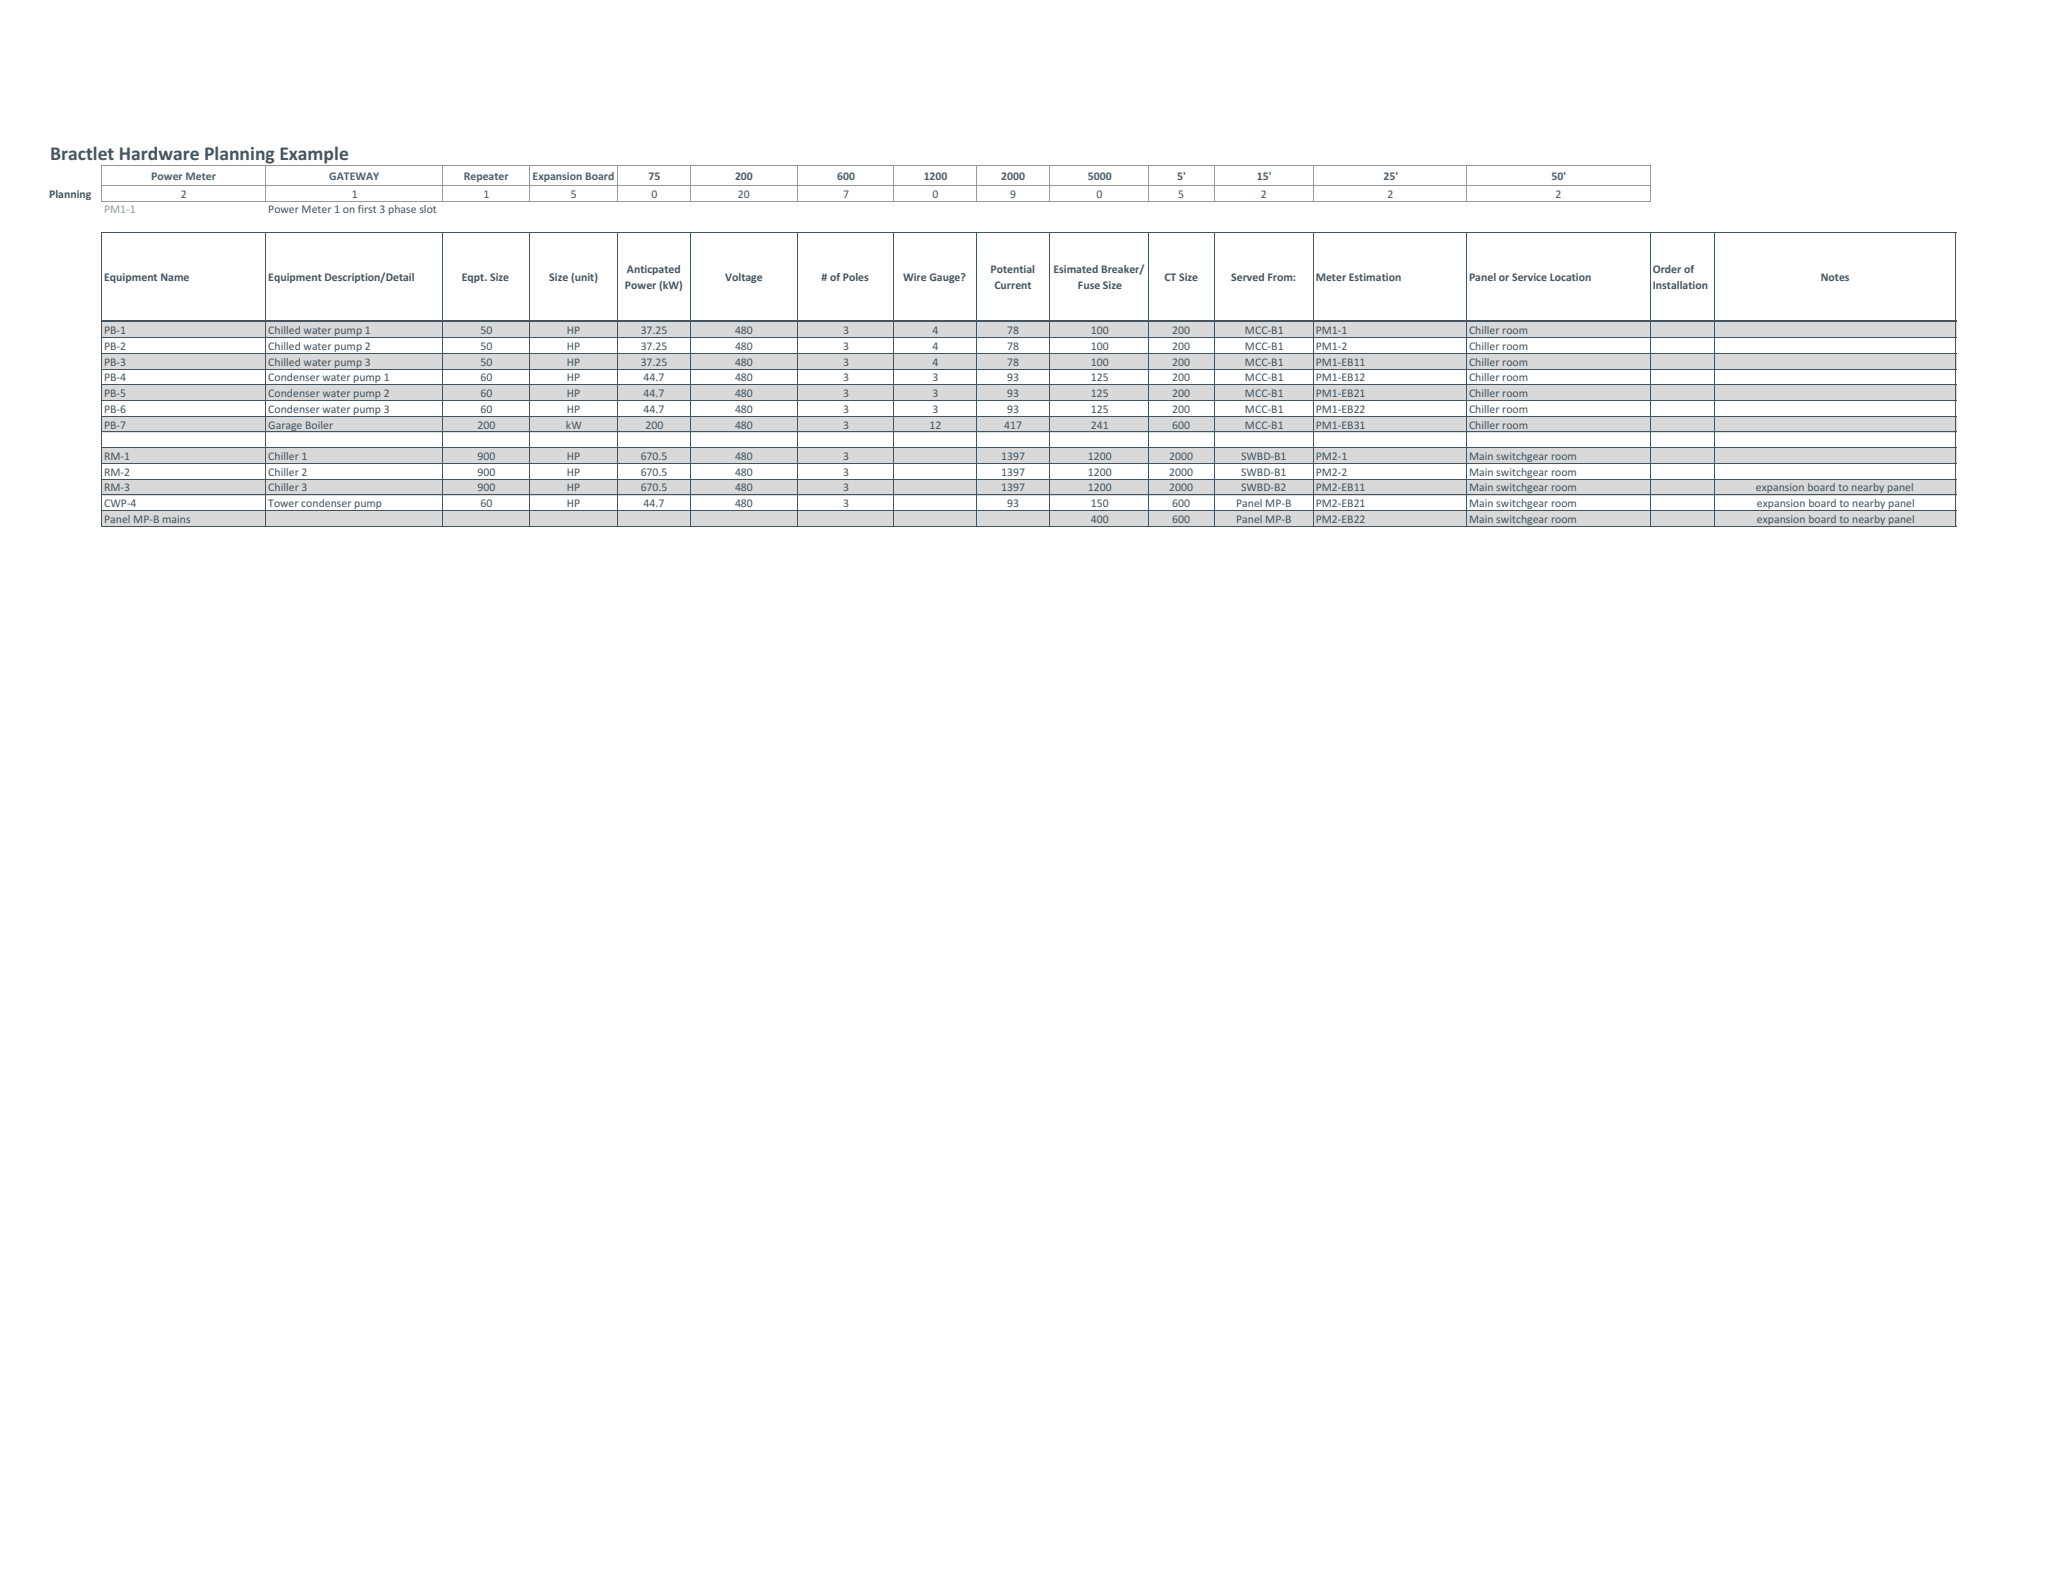
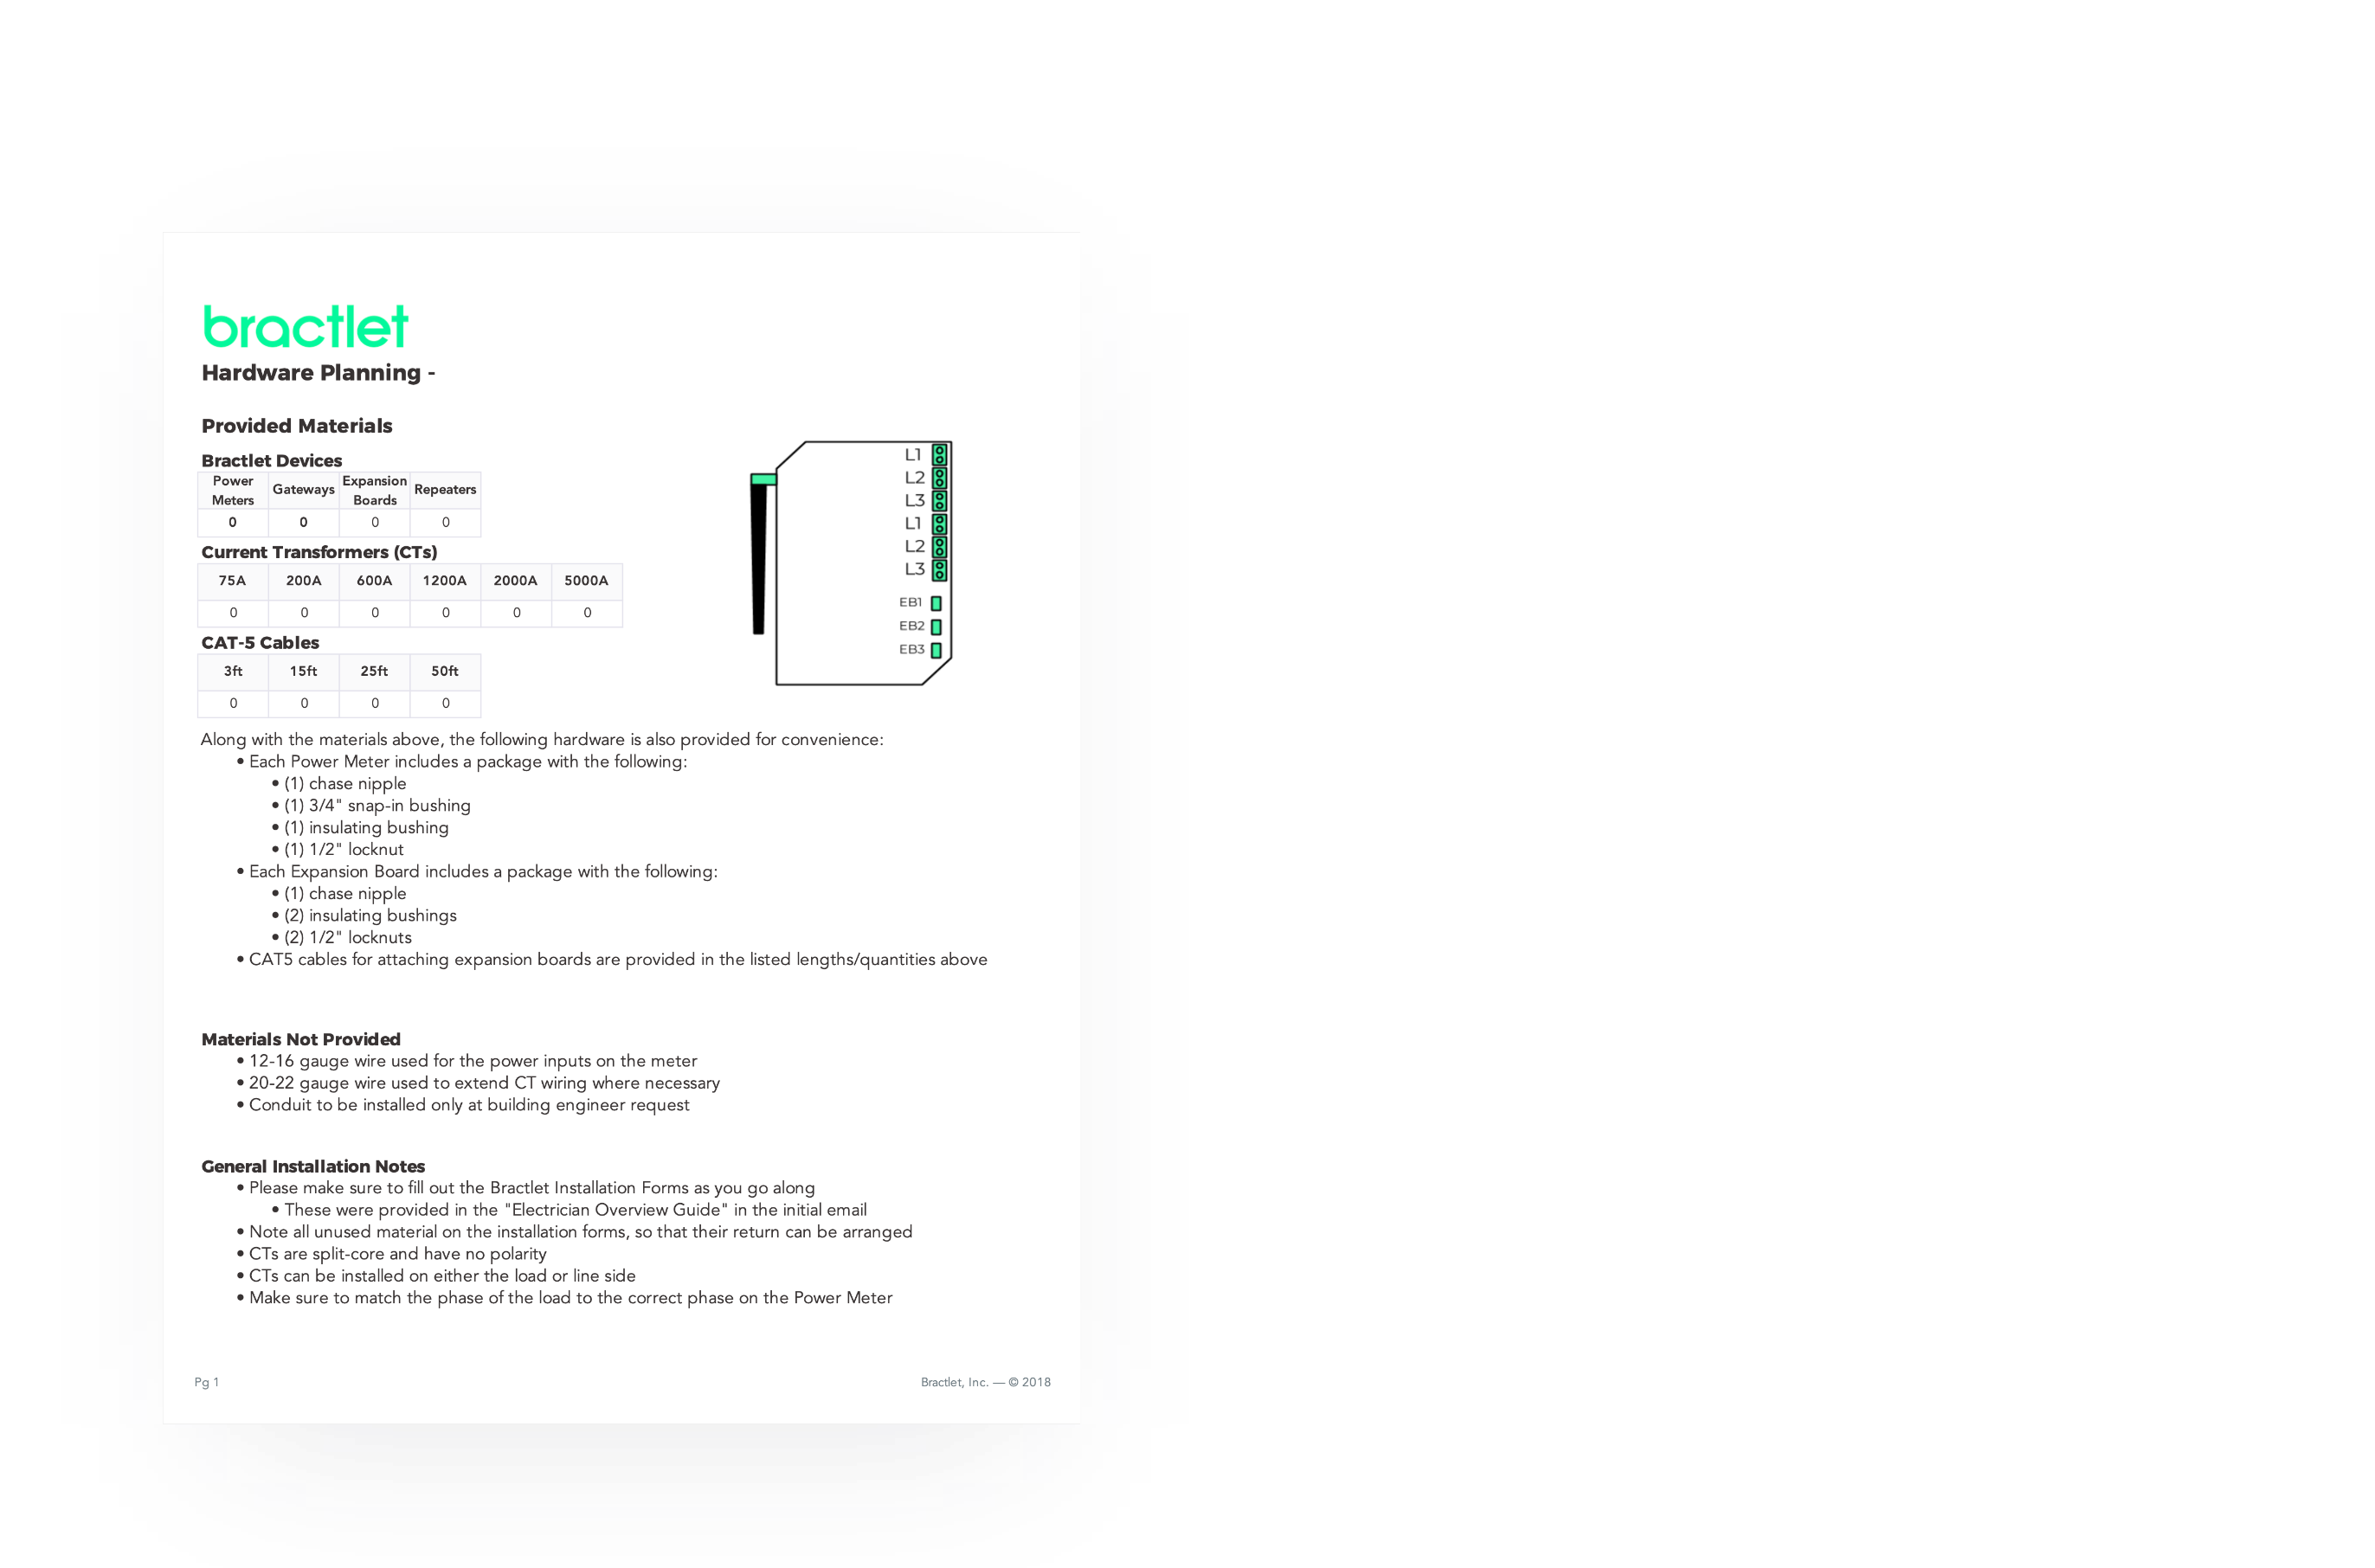
Bractlet Hardware Planning
The hardware planning sheet indicates load specific details and where the load will tie in on the meter or expansion board. You can also find the location of the load down to the panel and where it is located in the building. Example PM#-1 and PM#-2 indicate power meter 1 and the first set of 3 phase slots on the power meter. PM#-EB11 and -EB12 refers to the first board slots 1 and 2 of 3 phase groupings, respectively.
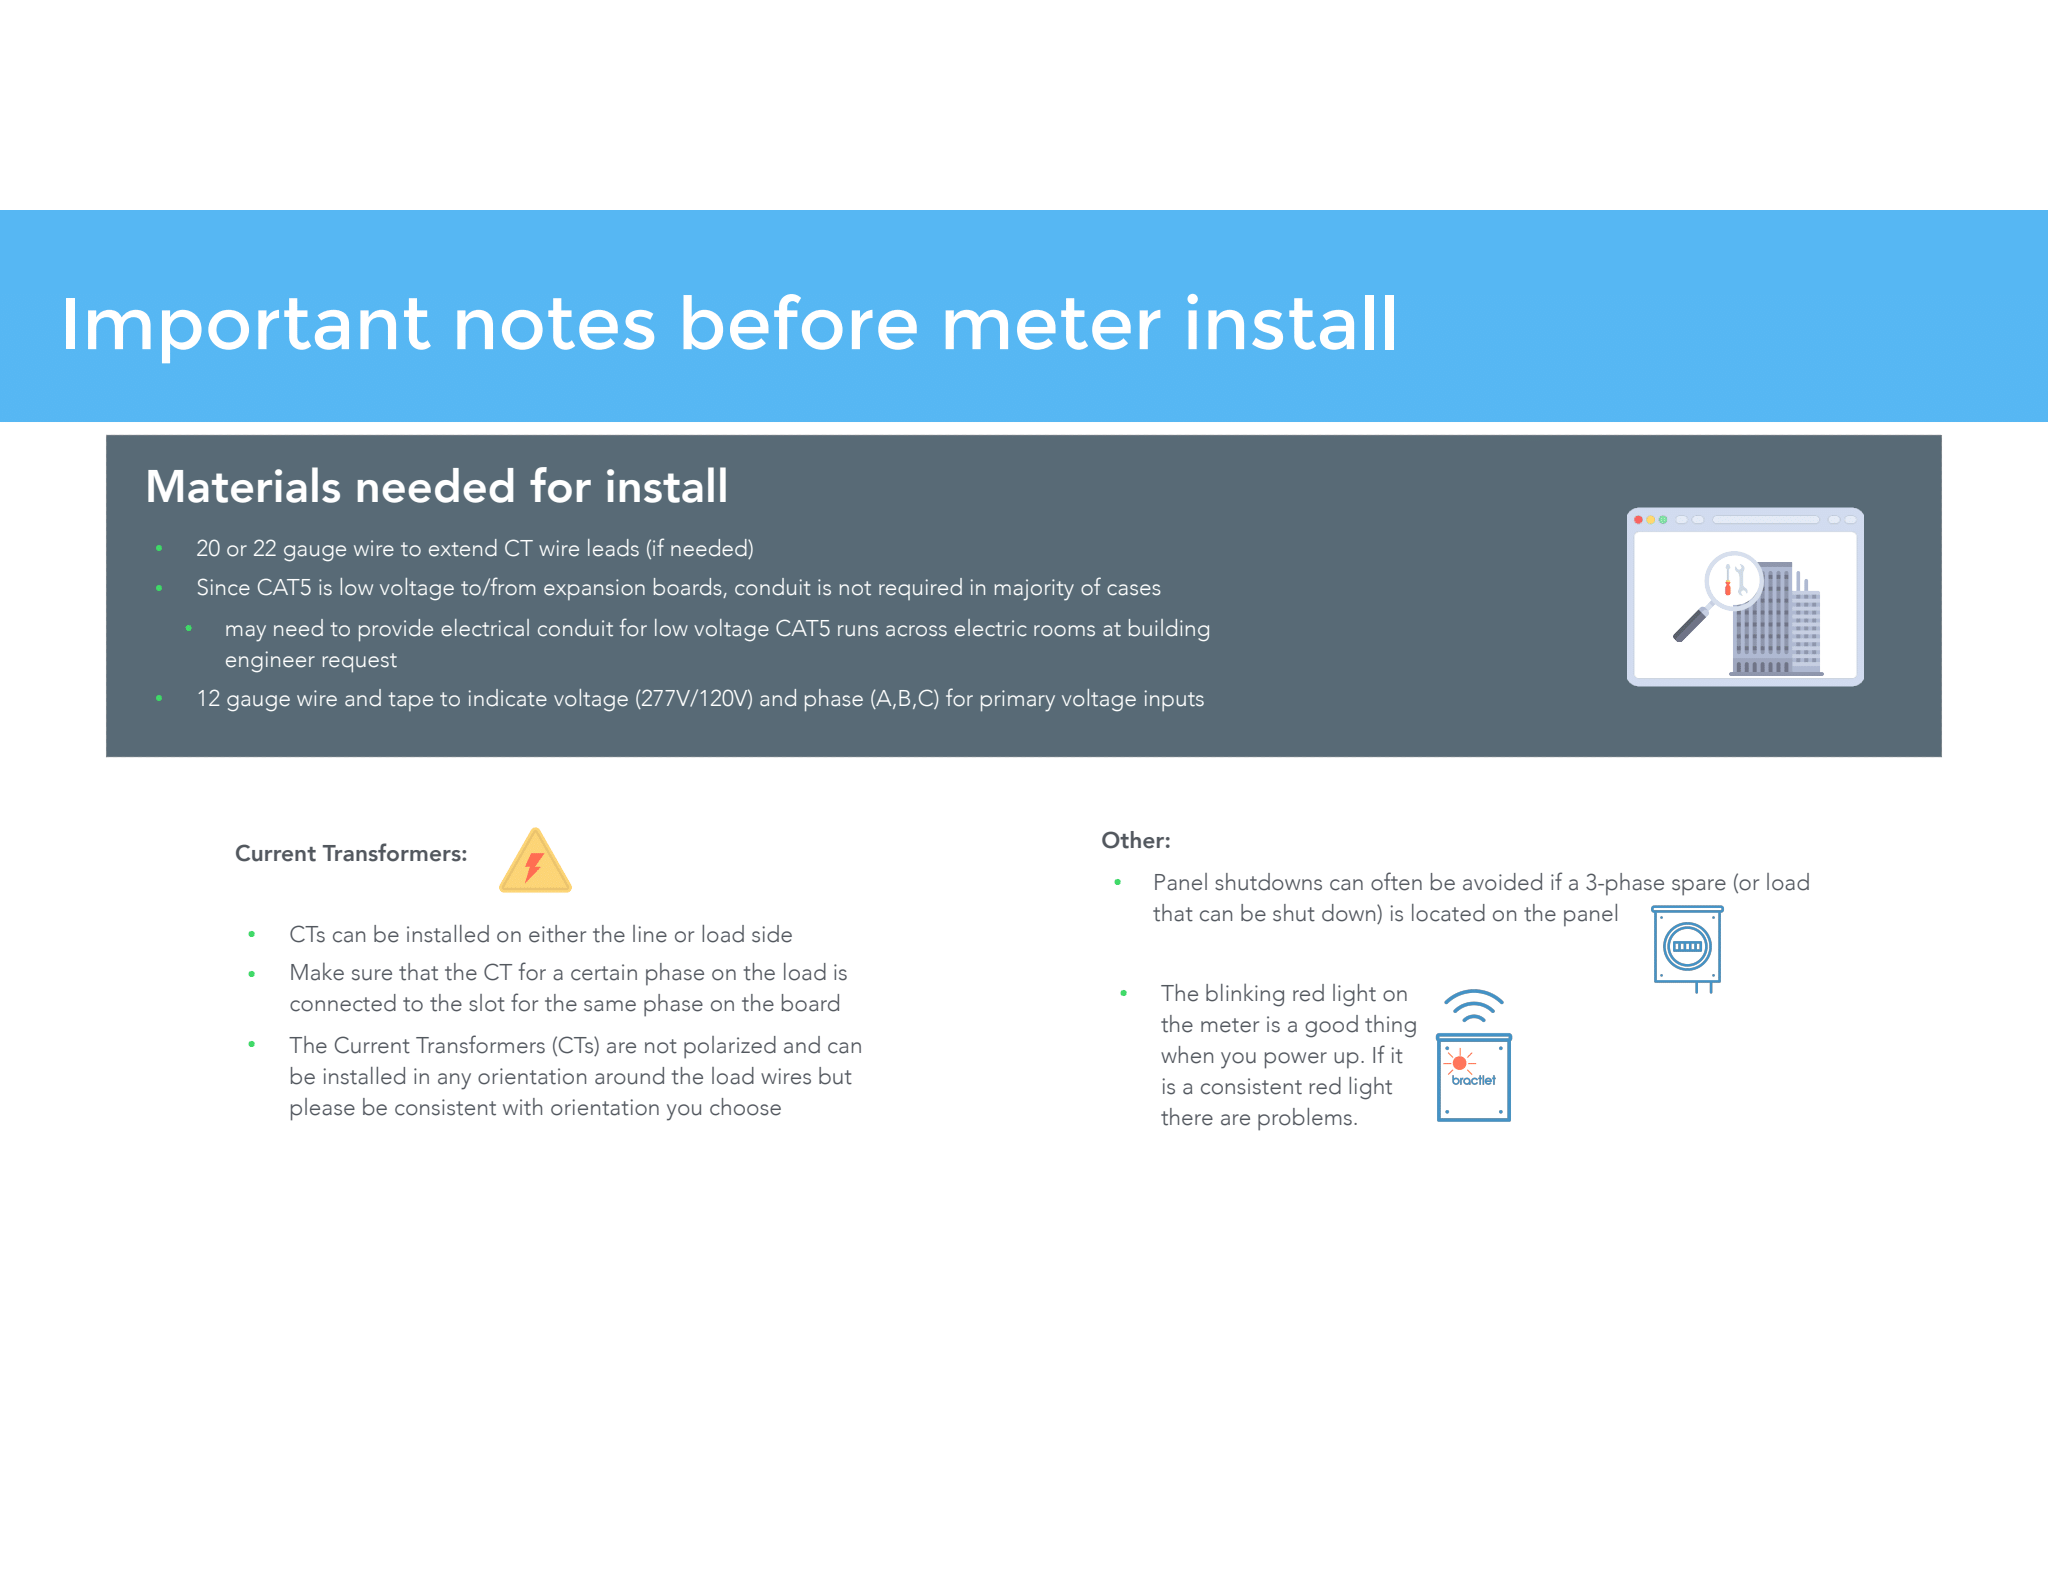
Important Information Before Meter Install
From the materials needed to the information you need to know, this is the document to fill in the blanks.